Clip Studio Paint isn’t just software; it’s a digital art powerhouse. This guide dives deep into its features, from basic interface navigation to advanced animation and 3D modeling techniques. Whether you’re a seasoned pro or just starting out, we’ll cover everything from mastering brush engines and understanding layer masks to creating stunning comic panels and realistic skin textures. Get ready to unlock your creative potential!
We’ll explore the differences between Clip Studio Paint Pro and EX, customize your workspace, and delve into the intricacies of digital painting, including blending modes, lighting, and shadow effects. We’ll also show you how to leverage its animation tools, 3D modeling capabilities, and even create and share your own custom assets. Think of this as your ultimate Clip Studio Paint survival guide.
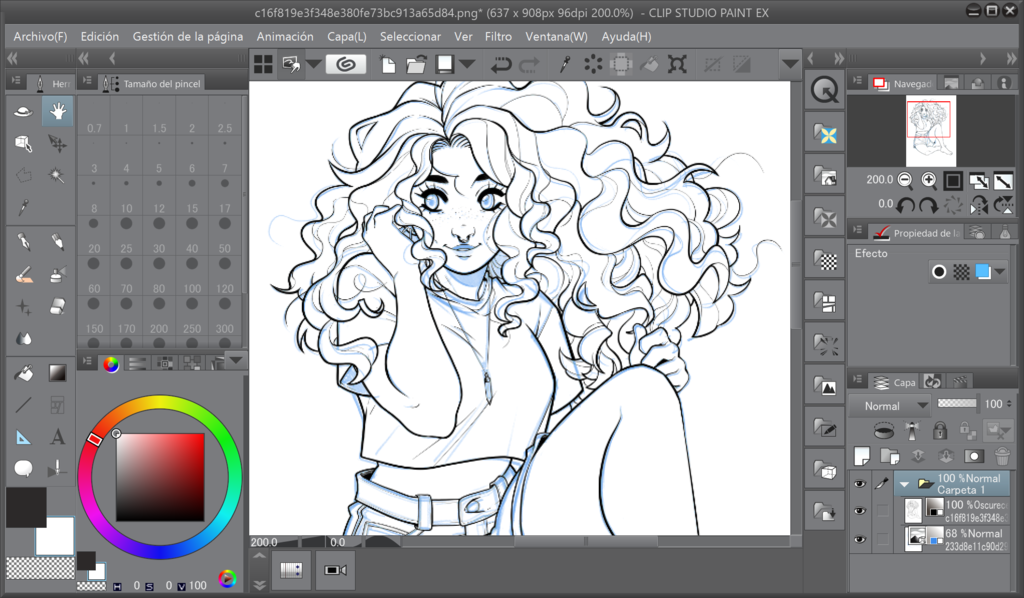
Clip Studio Paint Interface
Okay, so you’ve got Clip Studio Paint – congrats! Now let’s dive into actuallyusing* the thing. This tutorial will cover the basic workspace elements to get you started, and then we’ll compare Pro and EX versions. After that, we’ll explore how to personalize your workspace to fit your workflow.
The Clip Studio Paint interface, while initially seeming overwhelming, is actually quite intuitive once you get the hang of it. Understanding the main components will significantly speed up your workflow. The key is to familiarize yourself with the main toolbars, palettes, and canvases.
Main Workspace Elements
The Clip Studio Paint workspace is highly customizable, but some core elements remain consistent. These elements allow for efficient workflow and creative control. Understanding their functions is crucial for effective use of the software.
- Menu Bar: Located at the very top, this houses all the major commands and settings, from file management to layer adjustments.
- Tool Properties Palette: This dynamic palette changes depending on the tool selected. It provides options for brush size, opacity, color, and other tool-specific settings.
- Sub Tool Palette: This palette displays all the available sub-tools for the currently selected tool. For example, selecting the “Brush” tool will reveal a wide array of brush sub-tools.
- Layer Palette: This is arguably the most important palette. It allows you to manage your layers, adjust layer opacity, blending modes, and more. Understanding layers is key to digital art.
- Canvas: This is where the magic happens! This is your digital drawing surface where you create your artwork.
- Tool Palette: This palette displays the main tools such as brushes, pencils, pens, erasers, and selection tools. It provides quick access to essential tools.
Clip Studio Paint Pro vs. EX Comparison
Choosing between Clip Studio Paint Pro and EX depends on your needs and budget. While Pro offers a robust set of features, EX expands on these, adding functionalities that are particularly beneficial for professional workflows and animation.
| Feature | Clip Studio Paint Pro | Clip Studio Paint EX | Difference Summary |
|---|---|---|---|
| 3D Model Import | No | Yes | EX allows importing 3D models for reference and tracing. |
| Animation | Limited | Full featured | Pro has basic animation features, while EX offers a comprehensive animation workflow. |
| Multi-page Editing | Yes | Yes (enhanced) | Both support it, but EX offers more advanced features for managing multiple pages, especially for comics and manga. |
| Perspective Ruler | Yes | Yes (enhanced) | Both offer perspective rulers, but EX provides more sophisticated options and control. |
Interface Customization Options
Clip Studio Paint offers extensive customization options, allowing you to tailor the workspace to your preferences and workflow. This improves efficiency and reduces frustration. Proper customization is essential for maximizing productivity.
- Workspace Layout: You can freely move, dock, and undock palettes, creating a layout that best suits your needs. Experiment to find the perfect arrangement for your workflow.
- Tool Customization: You can customize shortcuts, brush settings, and tool options to streamline your creative process. This saves time and improves precision.
- Color Palette: You can create and save custom color palettes, making it easy to access your frequently used colors. This improves consistency and efficiency.
- UI Scaling: Adjust the size of the interface elements for better visibility, particularly on high-resolution displays. This enhances usability and comfort.
- Keyboard Shortcuts: Customize keyboard shortcuts to access frequently used functions quickly. This dramatically improves workflow speed.
Drawing Tools and Features

Okay, so we’ve covered the interface, now let’s dive into the real meat and potatoes: the drawing tools themselves! Clip Studio Paint is seriously loaded with options, but once you get the hang of it, it’s a total game-changer. We’ll focus on the brush engines and how to use them to create different textures and effects, plus how to leverage those perspective rulers to keep your art looking sharp.
Brush Engines in Clip Studio Paint
Clip Studio Paint boasts several brush engines, each offering unique capabilities. Understanding these engines is key to mastering the program’s versatility. The default engine, for instance, is great for general-purpose drawing, offering a balance of speed and control. Then there’s the “Real Pencil” engine, which mimics the feel of traditional pencils remarkably well, with variations in line weight based on pressure and angle.
The “Oil Paint” engine provides a rich, impasto effect, ideal for creating textured paintings. The “Watercolor” engine, as you might guess, emulates watercolor techniques, allowing for soft blending and transparent washes. Experimenting with each engine will reveal its strengths and how it can contribute to your unique style. Different engines are best suited for different media and effects.
Think of it like having a whole box of different art supplies at your fingertips.
Creating Textures with Brush Tools, Clip studio
Let’s talk texture! Creating convincing textures in digital art is all about using the right tools and techniques. For example, to create a rough, canvas-like texture, you might use a brush with a textured tip from the “Real Pencil” or “Oil Paint” engine, varying your pressure to create areas of heavier and lighter application. For a smoother, more blended texture, the “Watercolor” engine’s ability to blend colors seamlessly is perfect.
To mimic the texture of fabric, you might use a custom brush with slightly irregular strokes and play with the opacity to simulate folds and shadows. Think about real-world textures: wood grain, stone, fur—and experiment with different brush settings like spacing, angle jitter, and size jitter to get the effect you want. It’s all about understanding how the tool interacts with the canvas and then applying your artistic vision.
Using Perspective Rulers and Guides
Perspective is crucial for creating believable environments and compositions. Clip Studio Paint’s perspective rulers are lifesavers. They allow you to set up one, two, or three-point perspectives, providing dynamic guides for your drawing. Simply create a ruler, then adjust the vanishing points to suit your composition. You can then use the ruler to accurately draw buildings, furniture, or any object that needs to conform to a consistent perspective.
Beyond the rulers, guides are also invaluable for creating symmetry, alignment, and consistent spacing between elements. Imagine drawing a symmetrical character – guides will keep your left and right sides perfectly mirrored. These tools drastically improve accuracy and consistency, allowing you to focus on your artistic vision rather than struggling with geometric accuracy. Using them consistently will elevate your artwork significantly.
Painting Techniques in Clip Studio Paint
Okay, so we’ve covered the basics of the Clip Studio Paint interface and tools. Now let’s dive into some seriously cool painting techniques that’ll elevate your digital art game. We’ll explore blending modes, tackle realistic skin texture, and master dynamic light and shadow – all within the awesome environment of CSP.
Blending Modes and Their Effects
Blending modes are like secret weapons in digital painting. They dramatically alter how layers interact, creating effects you can’t achieve with simple opacity adjustments. Instead of just laying one color on top of another, blending modes modify how the colors combine, resulting in a wide range of visual effects. Experimentation is key here; each mode behaves uniquely depending on the colors and layer contents involved.
- Normal: This is your default mode; the top layer simply sits on top of the bottom layer.
- Multiply: Darkens the base layer by multiplying the colors. Great for creating shadows and depth.
- Screen: Lightens the base layer. Think highlights and adding luminosity.
- Overlay: Creates a balance between Multiply and Screen, depending on the base layer’s color. Good for adding subtle highlights and shadows.
- Add: Brightens the base layer, adding luminosity. Can be useful for creating glowing effects.
- Subtract: Darkens the base layer, useful for creating darker shadows or a more muted effect.
- Difference: Creates a contrast effect between the layers, often resulting in interesting color shifts.
Creating Realistic Skin Texture
Let’s craft some realistic skin. We’ll break it down step-by-step.
- Base Color: Start with a smooth base color, slightly warmer than you might initially think. Think peachy undertones.
- Underpainting: Add subtle shadows and highlights using a soft brush. This establishes the basic form and volume of the face.
- Midtones: Using a slightly less saturated color, add midtones to break up the flatness of the base color. Focus on areas where light and shadow meet.
- Texture: Now, for the fun part! Use a textured brush to add subtle variations in color and tone, simulating pores and skin imperfections. Don’t go overboard; keep it subtle and believable.
- Blending: Gently blend the textures using a soft brush with low opacity. This creates a smoother, more natural look.
- Highlights: Add sharp highlights to areas like the cheekbones and nose bridge, using a small, hard brush. This enhances the three-dimensionality of the skin.
- Refining: Continue to refine the details, adjusting colors and values as needed. Pay close attention to the subtle transitions between light and shadow.
Creating Dynamic Light and Shadow Effects
Dynamic light and shadow breathes life into a painting. It’s all about understanding how light interacts with form.Think of a light source – let’s say a bright lamp to the upper left. This dictates where the highlights and shadows fall.
- Light Source Placement: First, decide on your light source’s position. This dictates the direction of highlights and shadows.
- Core Shadows: Identify the areas directly opposite the light source. These will be your core shadows, the darkest parts of your painting.
- Halftones: The areas between the core shadows and highlights are your halftones. They provide transition and depth.
- Highlights: These are the brightest areas, directly facing the light source. They add volume and realism.
- Reflected Light: Don’t forget reflected light! Light bounces off surfaces, creating subtle highlights in shadowed areas. This adds a touch of realism.
- Ambient Light: A soft, overall light that fills in the shadows. This keeps your painting from becoming too dark and harsh.
Animation Features
Okay, so you’ve mastered the basics of Clip Studio Paint – drawing, painting, the whole shebang. Now let’s dive into the fun stuff: animation! Clip Studio Paint offers a surprisingly robust animation workflow, even without needing the EX version for some basic animation tasks. We’ll cover the essentials, focusing on getting you up and running with simple animations.Clip Studio Paint’s animation features are surprisingly powerful for a program that’s primarily known for its illustration capabilities.
The animation timeline is intuitive and allows for straightforward keyframe animation, making it accessible to beginners while still offering advanced features for more experienced animators. Whether you’re aiming for a short looping animation or something more complex, CSP provides the tools to bring your drawings to life.
Creating a Simple Animation Workflow
To create a simple animation, you’ll first need to set up your canvas. Think about the size and frame rate – for a simple animation, a smaller canvas (like 640×480 pixels) and a lower frame rate (12-24 fps) are totally fine to start with. This will make rendering and exporting much faster and easier. Then, create your individual frames as separate layers in your animation timeline.
Let’s say you’re animating a bouncing ball. You’d draw the ball in slightly different positions on separate layers, creating keyframes for the highest and lowest points of the bounce. Then, CSP’s interpolation will help create the smooth movement between these keyframes. Remember to save your work frequently!
Using Animation Timelines and Keyframes
The animation timeline in Clip Studio Paint is located at the bottom of the screen. It’s a horizontal bar where you can see your individual frames. Each frame is a layer, and you can add, delete, and rearrange them easily. Keyframes are the frames where you make significant changes to your drawing. For example, in our bouncing ball animation, the keyframes would be the highest and lowest points of the bounce, as well as the frames where the ball changes direction.
Between the keyframes, CSP automatically interpolates the movement, creating smooth transitions. You can adjust the interpolation method (linear, smooth, etc.) to fine-tune the animation’s smoothness. Experiment to see what works best for your style!
Animation Features in Clip Studio Paint EX
Clip Studio Paint EX expands upon the basic animation features, offering functionalities such as onion skinning (seeing previous and future frames to aid in creating smooth movement), more advanced interpolation options, and tools specifically designed for animation workflows. While the basic version provides a solid foundation, EX unlocks a more professional animation experience. Features like the timeline’s ability to handle more layers and frames efficiently, alongside more sophisticated animation tools, are key differences that can significantly improve your animation process.
Consider upgrading if you plan on doing more serious animation projects.
3D Modeling in Clip Studio Paint
Okay, so we’ve covered the basics of CSP, and now let’s dive into something pretty cool: its surprisingly robust 3D modeling capabilities. While it’s not a full-blown 3D modeling suite like Blender or Maya, CSP’s 3D features are surprisingly useful for artists, especially for integrating 3D models into your 2D workflow. Think of it as a powerful tool to boost your illustration and animation game, not a replacement for dedicated 3D software.CSP allows you to import a variety of 3D model formats (.fbx, .obj being the most common).
Once imported, you can manipulate them in several ways: rotating, scaling, and positioning within your canvas. You can also adjust lighting, add materials (though the material options are more limited than in dedicated 3D programs), and even change the camera angle to find the perfect perspective for your reference. This makes it incredibly efficient for creating dynamic poses for characters or objects without having to draw them from scratch.
Think about the time saved – no more struggling to perfectly render a complex object from memory!
3D Model Import and Manipulation
Importing 3D models into CSP is pretty straightforward. You’ll typically find the option under the “3D” menu. After selecting your model file, CSP will import it into your canvas. From there, you can use the various transformation tools (scale, rotate, move) to position and orient the model. You’ll also notice options to adjust the model’s lighting – a simple but effective way to alter the mood and appearance of your 3D element.
While CSP doesn’t offer the advanced material editing found in professional 3D software, you can alter the basic color and surface properties of the imported model, giving you a degree of customization. Experimenting with different lighting setups can dramatically change the look of your model, adding depth and realism.
Using 3D Models as References for 2D Illustrations
This is where CSP’s 3D features really shine. Instead of wrestling with anatomy or perspective, you can use a 3D model as a dynamic poseable reference. Import a 3D model of a character, adjust the pose to your liking, and then use it as a guide to create your 2D illustration. This helps ensure anatomical accuracy and consistency in your artwork.
You can lower the opacity of the 3D model layer to easily trace or paint over it. It’s like having a perfect, adjustable mannequin for your drawings. This is particularly useful for complex poses, dynamic actions, or when dealing with difficult perspectives. Think about the time and effort saved, especially when drawing multiple characters in complex positions!
Creating a Simple 3D Model in Clip Studio Paint
While CSP isn’t primarily a 3D modeling program, it does offer basic 3D primitive shapes (cubes, spheres, cylinders, etc.) that you can use as building blocks. Let’s create a simple, stylized character.First, select the “3D” menu, then “New 3D object.” Choose a basic cube as a starting point. Use the transformation tools to resize and position it to form the character’s torso.
Add another cube, scaling it down, to represent the head. You can use more cubes for arms and legs. Remember, we’re aiming for a stylized look, so perfect proportions aren’t necessary. To add detail, use the “Edit 3D object” option to manipulate the vertices and edges of your cubes, creating a more organic shape. You can also add basic cylindrical shapes for limbs, refining the character’s silhouette.
Finally, you can experiment with different materials and lighting to give your 3D model a unique appearance. This simplified approach allows for quick prototyping and testing of character designs before committing to a fully rendered 2D illustration. Remember to utilize the layers and adjust opacity for a seamless workflow between 3D and 2D elements.
Comic and Manga Creation
So, you’ve mastered the tools of Clip Studio Paint, and now you’re ready to unleash your inner mangaka or comic book artist? Awesome! This section will dive into the specifics of crafting compelling comics and manga, from panel layouts to dynamic sound effects. We’ll cover best practices to help you create truly engaging visual storytelling.Creating dynamic and engaging comics and manga involves more than just great art; it’s about thoughtful composition and effective visual communication.
Understanding panel layouts, speech bubbles, and inking techniques are crucial for conveying the narrative’s pace, emotion, and overall impact.
Comic Panel Layouts and Best Practices
Effective panel layouts guide the reader’s eye through the story, controlling the pace and emphasis. Consider the size and shape of your panels. Larger panels can emphasize important moments, while smaller panels can create a sense of speed or urgency. Experiment with different arrangements – a grid layout provides a structured feel, while a more chaotic arrangement can reflect a frenzied scene.
Think about using gutters (the space between panels) to create visual breaks and guide the reader’s flow. For example, a wide gutter might suggest a significant time jump, while a narrow gutter emphasizes a continuous action. Remember to consider the “reading direction” – in Western comics, we read left-to-right, top-to-bottom, but manga typically follows a right-to-left, top-to-bottom format.
Creating Speech Bubbles and Sound Effects
Speech bubbles are more than just containers for dialogue; they’re expressive elements in themselves. Different shapes and styles convey tone and emotion. A simple rectangular bubble might indicate straightforward conversation, while a jagged bubble can represent shouting or anger. Consider the size and placement of the bubble in relation to the character and the panel. Similarly, sound effects are crucial for enhancing the dynamism of your comic.
Experiment with different fonts, sizes, and styles to create a visual representation of the sound. A large, bold “BOOM!” will have a much different impact than a small, delicate “whisper.” Consider the relationship between the sound effect’s visual design and its placement within the panel to maximize its impact. For instance, a “SWISH” sound effect might be depicted as a long, thin line following the movement of a character.
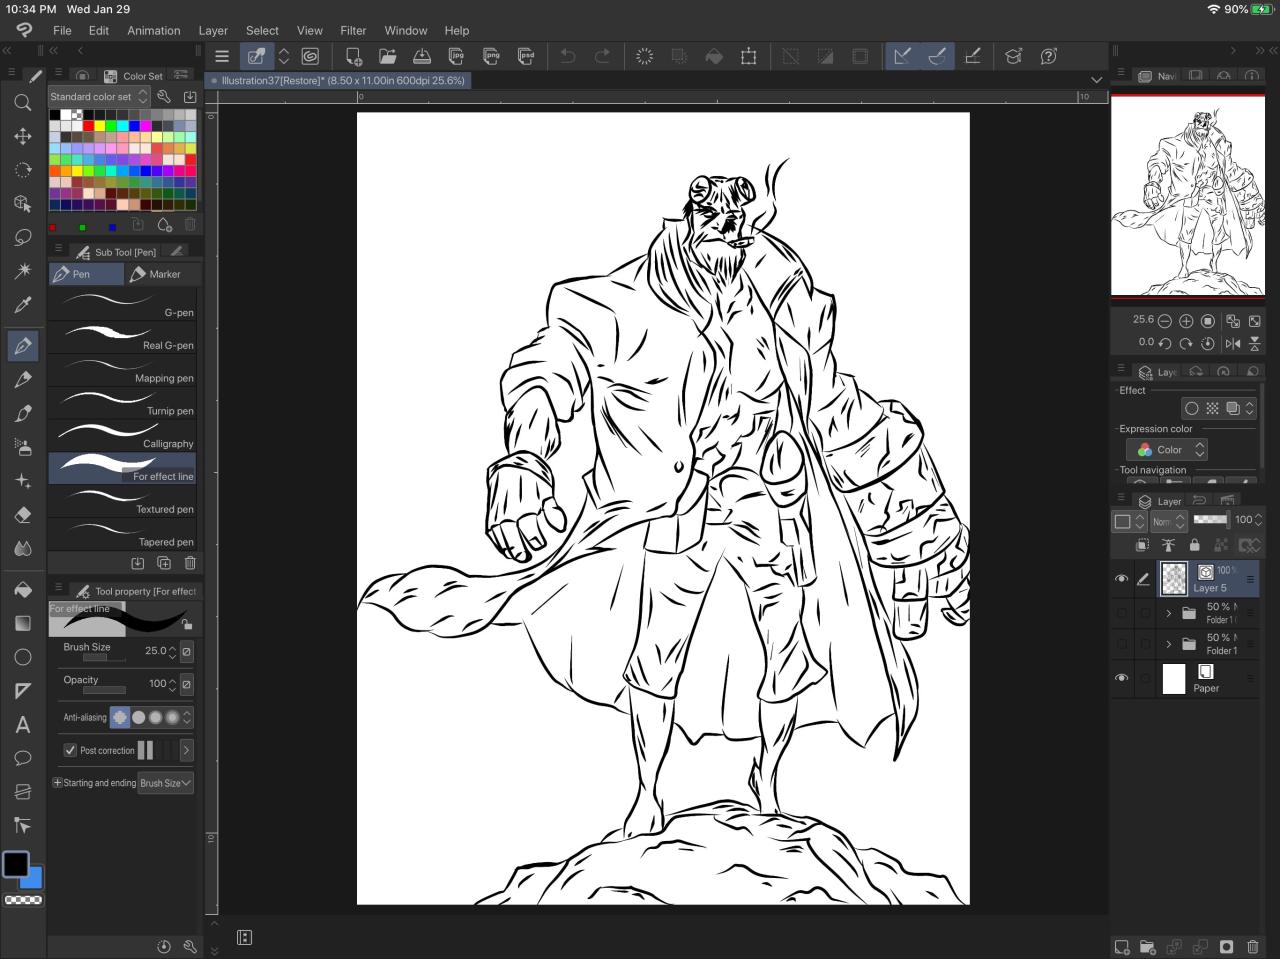
Manga Inking Techniques
Inking is a vital step in manga creation, defining the lines and details that bring your characters and setting to life. Various techniques exist, each offering a unique aesthetic. The “clean line” style uses precise, crisp lines for a polished look, often seen in shonen manga. In contrast, a more “rough” or “sketchy” inking style can create a grittier, more expressive feel, often employed in seinen manga.
Another technique involves varying line weights; thicker lines add emphasis and depth, while thinner lines create a sense of delicacy or distance. Experiment with different brushes in Clip Studio Paint to achieve these effects. For example, the G-pen is popular for its versatility, while the mapping pen allows for creating more textured lines. Finally, consider using screentones (digital textures) to add shading and texture to your artwork, enhancing depth and realism.
A variety of screentones are available within Clip Studio Paint, offering diverse options for creating visual interest and texture.
Working with Layers and Masks
Okay, so we’ve covered the basics of Clip Studio Paint, and now it’s time to level up your workflow with layers and masks. These are seriously game-changing tools for creating complex and polished artwork, allowing for non-destructive editing and super organized projects. Think of them as your secret weapons for digital art mastery.Layers are essentially stacked transparent sheets where you can draw, paint, and add effects.
Masks let you selectively hide or reveal portions of a layer, providing amazing control over blending and composition. Mastering these will transform your digital art game.
Layer Types and Their Uses
Clip Studio Paint offers a variety of layer types, each with its own unique properties and functionalities. Understanding these different types is crucial for efficient and effective workflow. Using the right layer type from the start saves you tons of time and frustration down the line.
- Raster Layers: These are the standard layers you’ll use most often. They work with pixels, allowing for detailed painting and editing. Think of them as your digital canvas. They’re great for things like painting, textures, and photo manipulation.
- Vector Layers: These layers use mathematical formulas to define lines and shapes, making them scalable without loss of quality. Perfect for creating crisp lines, logos, and illustrations that need to be resized repeatedly.
- Folder Layers: These are organizational powerhouses. They allow you to group multiple layers together, making it easy to manage complex artwork. You can also apply effects or transformations to an entire folder at once, saving you tons of time.
- Reference Layers: These layers are incredibly useful for bringing in reference images without affecting your actual artwork. They’re perfect for sketching from photos or other sources while keeping your final piece clean and organized.
- Correction Layers: These layers are like filters, applying adjustments such as brightness, contrast, or color balance to the layers below without directly modifying them. They are non-destructive, which is super important for maintaining flexibility in your artwork.
Using Layer Masks for Non-Destructive Editing
Layer masks are like stencils for your layers. They allow you to selectively hide or reveal portions of a layer without permanently deleting anything. This means you can always go back and make changes, a lifesaver when you’re experimenting with different effects or compositions.To use a layer mask, simply select the layer you want to mask and click the “Add Layer Mask” button.
A white mask will appear, representing the visible areas of your layer. Painting on the mask with black will hide parts of the layer, while painting with white will reveal them. Using shades of gray creates a gradual transition between visible and hidden areas. Think of it like using a gradual fade or a soft edge.
For example, you could use a layer mask to softly blend a character’s shadow into the background without harsh lines. You could also use it to selectively erase part of a brush stroke, leaving other parts intact.
Organizing Layers for Complex Illustrations
Organizing your layers is key to maintaining sanity when working on complex illustrations. A well-organized layer structure makes editing, revising, and collaborating much easier. Think of it like having a super organized and labeled filing cabinet instead of a messy pile of papers.Here’s a suggested approach:
- Use Folder Layers: Group related layers (like all the elements of a character, or all the background layers) into folders. This is a great way to keep your workspace clean.
- Name Your Layers Clearly: Use descriptive names that accurately reflect the content of each layer. Instead of “Layer 1,” use “Character_Hair,” “Background_Mountains,” or “Details_Eyes.”
- Color-Code Your Layers (Optional): Assign colors to different layer types or groups to quickly identify them at a glance. This is a great visual cue for managing your layers.
- Use Layer Sets: For even more complex projects, use layer sets to group folders together. Think of them as sub-folders within your main file structure.
Color Management and Profiles
Okay, so we’ve covered the fun stuff – drawing, painting, animating. Now let’s talk about something equally crucial, but maybe a little less glamorous: color management. Think of it as the unsung hero of your digital artwork. Getting it right ensures your masterpiece looks consistent across different devices and printing methods. Ignoring it?
Well, let’s just say you might end up with a print that looks totally different from what you saw on your screen. Not cool.Color management involves controlling how colors are interpreted and reproduced throughout the entire workflow, from your initial digital sketch to the final printed piece or online display. It’s all about ensuring color accuracy and consistency across various devices and media.
This is especially important if you plan to print your work, collaborate with others, or share your art online. Different devices have different ways of displaying colors, so a color that looks perfect on your monitor might look washed out or overly saturated on someone else’s screen or a printed copy. Proper color management helps to minimize these discrepancies.
Color Profile Setup in Clip Studio Paint
Setting up color profiles in Clip Studio Paint is pretty straightforward. First, you need to understand that your monitor, printer, and even your scanner have their own color profiles – essentially, a description of how they handle color. Clip Studio Paint allows you to specify these profiles so it knows how to translate colors correctly. You’ll find these settings within the Preferences, usually under the “Color Settings” or a similar tab.
Here you can choose the appropriate profile for your monitor (often sRGB or Adobe RGB) and for your output device (e.g., your printer’s profile). It’s important to use a profile that matches your intended output; choosing the wrong one can lead to significant color shifts. For example, if you’re aiming for print, using a printer’s ICC profile is critical for accurate color reproduction.
For online use, sRGB is the standard. Clip Studio Paint often provides helpful guides and tutorials within the software’s help section to walk you through this process.
Color Spaces and Their Applications
Different color spaces represent color in different ways. Think of it like using different units of measurement – inches versus centimeters. Each has its strengths and weaknesses depending on what you’re trying to achieve. Some common color spaces include sRGB, Adobe RGB, and ProPhoto RGB.sRGB (Standard Red Green Blue) is the most common color space for the web and most monitors.
It’s a relatively small color gamut (the range of colors it can reproduce), meaning it can’t display every color imaginable, but it’s widely compatible. This makes it the safest bet for web graphics and general use.Adobe RGB (Adobe Red Green Blue) is a larger color space than sRGB, encompassing a wider range of colors. This is particularly beneficial for photographers and designers who need a broader color spectrum.
However, not all devices support Adobe RGB, so you might experience some color loss when viewing on screens or printers that don’t.ProPhoto RGB is an even larger color space, often used in high-end professional applications like photography and pre-press for print. It has an extremely wide gamut, but it’s less widely supported than sRGB or Adobe RGB. You’d typically only use this if you’re working with a very specific workflow and know your output device can handle the full range.
Converting from ProPhoto RGB to a smaller color space like sRGB for web display often leads to significant color shifts, so careful management is needed. Choosing the correct color space right from the start is key to avoiding problems down the line.
Clip Studio Paint Assets and Resources
Okay, so we’ve covered the basics of Clip Studio Paint – now let’s talk about the awesome stuff you can get to supercharge your workflow: assets! Think of them as the secret weapons of digital artists, expanding your creative toolkit beyond the built-in tools. The Clip Studio Asset store is your one-stop shop for all things extra.The Clip Studio Asset Store is basically a massive online marketplace brimming with brushes, materials, 3D models, and more, created by both Clip Studio Paint’s developers and a huge community of artists.
You can find everything from highly realistic textures to stylized manga brushes, and even pre-made 3D models to use in your illustrations or animations. It’s a game-changer for efficiency and expanding your artistic style. Finding and purchasing (or downloading free ones!) assets is super straightforward, making it easy to integrate them into your projects.
Useful Brushes, Materials, and 3D Models
The Clip Studio Asset Store offers a diverse range of assets. For example, you could find incredibly detailed brush sets mimicking traditional media like charcoal, watercolor, or even pen and ink. Imagine having a brush that perfectly replicates the texture of a specific type of paper, or one that automatically creates realistic fur. These are readily available. For materials, you’ll find everything from seamless textures (like wood, fabric, or stone) to pre-made patterns and backgrounds.
These can drastically reduce the time you spend creating backgrounds or adding details to your artwork. Finally, 3D models can range from simple geometric shapes to complex characters or props. These can be posed and rendered within Clip Studio Paint, providing a quick way to add depth and realism to your scenes. A good example would be a set of realistic human models for character design studies, or a collection of fantasy weapons to add to a game concept art piece.
Creating and Sharing Your Own Assets
Want to contribute to the community and even make some money? You can totally create and share your own assets! Clip Studio Paint makes it relatively easy to package your custom brushes, materials, or 3D models and upload them to the store. The process usually involves following specific guidelines on file formats and naming conventions, ensuring your assets are compatible with the platform.
Once uploaded and approved, your creations become available for other artists to purchase or download for free, depending on how you choose to license them. This opens up a new avenue for creative professionals to share their work and potentially earn income. It’s a fantastic opportunity to give back to the community and build your portfolio. Imagine your custom brush set for creating stylized hair becoming a go-to tool for other digital artists!
Troubleshooting Common Issues

So, you’ve conquered the basics of Clip Studio Paint, maybe even dabbled in animation or 3D modeling. But now you’re facing some frustrating glitches. Don’t worry, it happens to the best of us! This section will walk you through some common Clip Studio Paint problems and their solutions. Think of it as your personal troubleshooting guide to keep your creative flow going.
Brush Settings and Unexpected Behavior
Unexpected brush behavior, like strokes not appearing as expected or brushes behaving erratically, is a frequent source of frustration. This often stems from incorrect brush settings or accidental modifications. Checking your brush settings, including size, opacity, flow, and stabilization, is crucial. For example, a low opacity setting might result in faint strokes, while a high flow might lead to overly saturated lines.
Also, ensure that your brush isn’t accidentally set to a mode that’s interfering with your intended effect, such as “Add” or “Subtract.” If you’re experiencing consistent problems, try resetting your brush settings to the default values as a quick troubleshooting step. This helps isolate whether the issue lies with your specific brush customization or a broader software problem.
Okay, so Clip Studio’s awesome for digital art, right? But if you need to model a 3D character before you paint it, you might want to check out solidworks download for some serious 3D modeling power. Then, once you’ve got your model perfected, you can bring it back into Clip Studio for texturing and final rendering.
File Corruption and Data Loss
Losing your work is a nightmare scenario for any artist. File corruption can occur due to various reasons, including sudden power outages, software crashes, or even hard drive errors. Regular saving, utilizing the autosave function, and regularly backing up your files to an external drive are essential preventative measures. If you encounter a corrupted file, try opening it in a previous version of Clip Studio Paint, or seeking solutions through the official Clip Studio Paint support forums.
Remember, prevention is always better than cure when it comes to data loss. Consider adopting a version control system for larger projects, allowing you to revert to earlier saves.
Performance Issues and Slowdowns
Clip Studio Paint can be resource-intensive, especially when working with high-resolution images or complex animations. Slowdowns or freezes can result from insufficient RAM, a slow processor, or a lack of dedicated graphics memory. Closing unnecessary programs, reducing the canvas resolution if possible, and adjusting the performance settings within Clip Studio Paint itself can significantly improve performance. Consider upgrading your hardware if these adjustments don’t resolve the issue.
For example, if your computer has only 4GB of RAM, upgrading to 8GB or 16GB could drastically improve the responsiveness of the software.
Frequently Asked Questions
Here’s a quick FAQ addressing some common questions about troubleshooting in Clip Studio Paint.
| Question | Answer |
|---|---|
| My brush strokes are glitching or disappearing. | Check your brush settings (opacity, flow, stabilization). Try restarting Clip Studio Paint or your computer. Consider updating your graphics drivers. |
| My file won’t open. | Try opening it in a previous version of the software. If that fails, the file might be irrecoverably corrupted. |
| Clip Studio Paint is running very slowly. | Close unnecessary programs, reduce canvas resolution, adjust performance settings within Clip Studio Paint, and consider upgrading your hardware. |
| My colors look different on my screen versus print. | Calibrate your monitor and ensure you’re using appropriate color profiles for your workflow. |
Last Recap
From basic interface navigation to advanced animation techniques, this exploration of Clip Studio Paint has hopefully armed you with the knowledge to confidently tackle any digital art project. Remember, the key is practice and experimentation. Don’t be afraid to explore the vast toolset and discover your own unique workflow. Happy creating!
Essential Questionnaire
Is Clip Studio Paint only for drawing manga?
Nope! While it’s amazing for manga and comics, Clip Studio Paint is a versatile tool for all kinds of digital art, including illustration, animation, and even 3D modeling.
What’s the difference between the Pro and EX versions?
EX adds features like animation, 3D model import, and more advanced tools for comics and manga creation. Pro is a great starting point, but EX is worth considering if you need those extra capabilities.
How much does Clip Studio Paint cost?
Clip Studio Paint offers different licensing options, including subscription and perpetual licenses. Check their website for the latest pricing.
Is Clip Studio Paint compatible with my tablet?
Clip Studio Paint supports a wide range of tablets and styluses. Check their compatibility list on their website to see if yours is supported.
Where can I find tutorials and support?
Clip Studio Paint has a massive online community with tons of tutorials, forums, and support resources. You can also find many helpful videos on YouTube.