Download ChromeDriver – yeah, it sounds kinda techy, but it’s actually super important if you’re into automating web stuff. Think of it as the bridge between your code (like Selenium) and the Chrome browser. This guide will walk you through everything from finding the right version to troubleshooting those pesky installation issues, so you can start automating your browsing in no time.
We’ll cover downloading from official sources, handling multiple instances, even exploring the slightly spooky world of headless browsing (where Chrome runs without a visible window!). Get ready to level up your automation game!
This guide provides a comprehensive walkthrough of downloading and utilizing ChromeDriver, covering various aspects from version compatibility and secure download practices to advanced techniques such as headless browsing and managing multiple instances. We’ll delve into practical applications, troubleshooting common issues, and ensuring secure usage, empowering you to harness the full potential of automated web interactions.
Understanding ChromeDriver Versions

Getting the right ChromeDriver version is crucial for smooth automated browser testing. A mismatch between your ChromeDriver and Chrome browser versions can lead to frustrating errors and failed tests. This section explains ChromeDriver versioning and how to ensure compatibility.ChromeDriver versions are tied directly to specific Chrome browser versions. Each ChromeDriver release is designed to work with a particular range of Chrome versions, and using an incompatible version will result in errors.
Think of it like trying to fit a square peg into a round hole; it just won’t work. Understanding this relationship is key to successful automation.
ChromeDriver Version Compatibility
The following table illustrates the compatibility between several ChromeDriver versions and their corresponding Chrome browser versions. Note that this is not an exhaustive list, and newer versions are constantly released. Always check the official ChromeDriver website for the most up-to-date compatibility information.
| ChromeDriver Version | Supported Chrome Versions | Notable Features (Examples) | Notes |
|---|---|---|---|
| 114.0.5735.90 | 114.0.5735.90 – 115.0.5790.81 | Improved stability, bug fixes, better handling of certain web elements | Represents a recent stable release. |
| 113.0.5672.63 | 113.0.5672.63 – 114.0.5735.90 | Enhanced support for newer web technologies, performance improvements | A slightly older, but still widely used, version. |
| 112.0.5615.49 | 112.0.5615.49 – 113.0.5672.63 | Fixes for specific browser issues, improved logging | This version might be less supported now, but may still function for older Chrome installations. |
| 111.0.5563.64 | 111.0.5563.64 – 112.0.5615.49 | Initial support for a new Chrome feature (example: improved DevTools integration) | Older version, compatibility may be limited. |
| 110.0.5481.77 | 110.0.5481.77 – 111.0.5563.64 | Performance enhancements, security updates | Considered an older version; check for updates. |
Identifying the Correct ChromeDriver Version
To find the correct ChromeDriver, first determine your Chrome browser version. You can usually find this information in the Chrome browser’s “About” section (usually accessed through the three vertical dots in the upper right corner). Once you know your Chrome version (e.g., 114.0.5735.90), navigate to the official ChromeDriver downloads page. There, you can find the matching ChromeDriver version.
Make sure the ChromeDriver version is compatible with your Chrome version. Downloading the wrong version might result in errors during automation. Always download from the official source to avoid potential security risks.
Downloading ChromeDriver from Official Sources
Getting the right ChromeDriver is crucial for your Selenium automation projects. Downloading from official sources ensures you have a compatible and secure version, preventing frustrating compatibility issues and potential security risks. This section details how to download ChromeDriver directly from the Chromium project website.Downloading ChromeDriver involves navigating to the official website and selecting the correct version for your operating system.
The process is straightforward but requires careful attention to detail to ensure compatibility with your Chrome browser version. Incorrect versions can lead to errors and failures in your automation scripts.
ChromeDriver Download Locations
The official source for ChromeDriver downloads is the Chromium project’s website. While the exact URL might change slightly over time, searching “ChromeDriver download” on Google will typically lead you to the correct location. The download page will present you with a selection of versions, each corresponding to a specific Chrome browser version. It’s imperative to download the ChromeDriver version that matches your Chrome browser version; otherwise, your Selenium scripts will not function correctly.
Downloading ChromeDriver for Windows
This section provides a step-by-step guide for downloading ChromeDriver on Windows.
- Navigate to the ChromeDriver Download Page: A web browser window displays the ChromeDriver download page. The page features a list of available ChromeDriver versions, often organized by version number. It also might include release notes and a brief description of the software. The overall design is clean and straightforward.
- Locate the Correct Version: Find the ChromeDriver version compatible with your Chrome browser. This typically requires checking your Chrome version (usually found under “Help” -> “About Google Chrome”). The download page clearly displays the Chrome version each ChromeDriver version supports. You should carefully match these versions to ensure compatibility.
- Select the Windows Download: The page presents several download options based on the operating system. Select the appropriate “chromedriver_win64.zip” (for 64-bit Windows) or “chromedriver_win32.zip” (for 32-bit Windows) option. A button or link is usually clearly labeled with the file name and operating system compatibility.
- Download and Extract: Once you click the download link, the zip file will begin downloading to your computer. After the download completes, locate the zip file and extract its contents to a directory of your choice. This will usually involve right-clicking the zip file and selecting an “Extract All” option. A new folder containing the chromedriver.exe file will be created.
A screenshot at this step would show a Windows file explorer window, with the extracted `chromedriver.exe` file clearly visible within the newly created folder. The file name and icon would be prominent in the image. The file explorer’s address bar would also show the directory path where the file was extracted.
Third-Party ChromeDriver Sources
So, you’ve decided to download ChromeDriver. Great! But maybe you’re thinking about skipping the official website and grabbing it from somewhere else. Let’s talk about the pros and cons of using third-party sources for your ChromeDriver download. It’s a decision with some serious implications, so let’s weigh the options.Downloading ChromeDriver from unofficial sources presents a trade-off between convenience and security.
While some third-party sites might offer a quicker or seemingly easier download process, the risks involved can significantly outweigh any perceived benefits. The official source ensures you’re getting a clean, verified, and secure version.
Third-Party ChromeDriver Source Risks and Benefits
Using third-party sites to get ChromeDriver can seem tempting—maybe they’re faster or offer different versions. However, this convenience comes with significant security risks. Downloading from untrusted sources increases the chances of downloading malware or compromised versions of ChromeDriver, potentially exposing your system to viruses, data theft, or other malicious activities. On the other hand, some reputable third-party sites might offer slightly older versions which can be useful in certain situations, for example, if you need compatibility with a legacy browser version.
However, this benefit is far outweighed by the risks associated with less-than-reputable sources.
Comparison of ChromeDriver Sources
The following table compares the official ChromeDriver source with two examples of reputable third-party sources (note that the availability and reputation of third-party sources can change over time, so always exercise caution). This comparison focuses on key factors to consider when choosing a download source. Remember, even with reputable third-party sites, verifying the checksum is always a best practice.
| Source | Advantages | Disadvantages |
|---|---|---|
| Official Chromium Website (chromedriver.chromium.org) | Guaranteed authenticity, security, up-to-date versions, clear licensing information. | Potentially slower download speeds compared to some mirrors, requires navigating a website. |
(Example Reputable Third-Party Source 1 –
|
Potentially faster download speeds due to mirroring, may offer various versions. | Risk of outdated versions, reliance on a third-party for security verification, potential for hosting issues. |
(Example Reputable Third-Party Source 2 –
|
Similar to Source 1, potential for faster download and multiple versions. | Similar to Source 1, risk of outdated versions, reliance on a third-party for security verification, potential for hosting issues. |
Security Concerns of Unofficial ChromeDriver Downloads
Downloading ChromeDriver from unofficial sources introduces significant security vulnerabilities. Malicious actors could easily inject malware into seemingly legitimate ChromeDriver packages. This malware could steal sensitive information, such as login credentials, personal data, or financial details. Furthermore, compromised ChromeDriver versions could allow attackers to gain unauthorized access to your system, potentially leading to data breaches or system damage.
Always prioritize security by downloading from the official source or a highly reputable and verified third-party mirror that clearly states its source and offers checksum verification. Think of it like this: you wouldn’t download a critical system update from a random website; the same principle applies to ChromeDriver.
Verifying ChromeDriver Integrity
So you’ve downloaded ChromeDriver – congrats! But before you go installing it and automating your browser, let’s make sure you’ve got the genuine article. Downloading a corrupted or tampered-with file could lead to all sorts of headaches, from flaky tests to security vulnerabilities. That’s where checksum verification comes in. It’s a quick and easy way to ensure the file you downloaded is exactly what the official source intended.Checksums are essentially digital fingerprints of a file.
Different algorithms, like MD5, SHA-1, and SHA-256, produce unique checksums for the same file. If the checksum you calculate for your downloaded ChromeDriver matches the checksum provided by the official source, you can be confident that your download is intact and hasn’t been altered.
Checksum Calculation and Comparison
To verify ChromeDriver’s integrity, you’ll need a checksum utility. Many operating systems include command-line tools for this; for example, on macOS and Linux, you can use the `shasum` command, while Windows users can utilize tools like PowerShell or dedicated checksum utilities. The process involves calculating the checksum of your downloaded ChromeDriver file and comparing it to the checksum published by the official source (usually found on the download page alongside the ChromeDriver archive).Let’s say the official source provides an MD5 checksum of `a1b2c3d4e5f678901234567890abcdef`.
You would then use your chosen checksum utility to calculate the MD5 checksum of your downloaded `chromedriver.exe` (or similar, depending on your OS). For example, on a Linux/macOS system, the command might look like this: `shasum -a 256 chromedriver`. If the calculated checksum matches the one from the official source, you’re good to go. If they differ, it means the downloaded file is corrupted or has been tampered with.
Handling Mismatched Checksums
If the checksums don’t match, it’s crucial to take action. Don’t just ignore it and hope for the best! Here’s what you should do:
- Re-download the file: The most common cause of mismatched checksums is a corrupted download. Try downloading ChromeDriver again from the official source, ensuring a stable internet connection.
- Verify your internet connection: A poor or interrupted connection during the download can lead to an incomplete or damaged file. Check your internet stability and try again.
- Check the checksum algorithm: Make sure you’re using the correct checksum algorithm (MD5, SHA-1, or SHA-256) that matches the one provided by the official source.
- Check the source: If you downloaded from a third-party site, it might be offering a modified or malicious version of ChromeDriver. Stick to official sources to avoid problems.
If, after all these steps, the checksums still don’t match, it’s highly likely that the downloaded file is compromised. In this case, it’s best to avoid using that file and download a fresh copy from a trusted source. Remember, verifying checksums is a critical step in ensuring the security and reliability of your automated testing environment.
Installing ChromeDriver
Getting ChromeDriver up and running is pretty straightforward, but the exact steps vary slightly depending on your operating system. This section will walk you through the installation process for Windows, macOS, and Linux, ensuring you’re ready to automate your browser interactions. Remember to always download ChromeDriver from a trusted source, as discussed previously.
The core process involves downloading the correct ChromeDriver version for your Chrome browser version, extracting the downloaded file (if necessary), and then adding the ChromeDriver directory to your system’s PATH environment variable. This allows your system to find ChromeDriver easily when you run your Selenium scripts.
ChromeDriver Installation on Windows
Installing ChromeDriver on Windows is typically a simple process involving downloading the zip file, extracting its contents, and then updating your system’s PATH environment variable. This ensures your system can locate the ChromeDriver executable.
- Download the appropriate ChromeDriver zip file from the official or a trusted third-party source.
- Extract the contents of the zip file to a directory of your choice. A common location is
C:\chromedriver, but you can choose any location that works for you. - Open the System Properties window (search for “environment variables”).
- Click “Environment Variables…”.
- Under “System variables,” find the “Path” variable and select it. Click “Edit…”.
- Click “New” and add the path to the directory where you extracted ChromeDriver (e.g.,
C:\chromedriver). - Click “OK” on all open windows to save the changes.
- Restart your command prompt or terminal to ensure the changes take effect.
ChromeDriver Installation on macOS
The macOS installation is similar to Windows, but involves using the downloaded zip archive and updating your PATH using the terminal.
- Download the ChromeDriver zip file for macOS.
- Extract the contents of the zip file. A common location is
/usr/local/bin, but you can choose another if you prefer. - Open your terminal.
- Use the following command to add the ChromeDriver directory to your PATH (replace
/path/to/chromedriverwith the actual path):export PATH="/path/to/chromedriver:$PATH" - To make this change permanent, add the
export PATH="/path/to/chromedriver:$PATH"line to your~/.bash_profileor~/.zshrcfile (depending on your shell).
ChromeDriver Installation on Linux
Linux installation mirrors the macOS process, leveraging the terminal for both extraction and PATH modification. Remember to use the appropriate commands for your specific Linux distribution.
- Download the ChromeDriver zip or tar.gz file for Linux.
- Extract the contents of the archive. A suitable location might be
/usr/local/binor/usr/bin, but you can choose another if you prefer. - Open your terminal.
- Use the following command to add the ChromeDriver directory to your PATH (replace
/path/to/chromedriverwith the actual path):export PATH="/path/to/chromedriver:$PATH" - To make this change permanent, you’ll need to add the
export PATH="/path/to/chromedriver:$PATH"command to your shell’s configuration file (e.g.,~/.bashrc,~/.zshrc, etc.). The exact method for doing this varies depending on your distribution and shell.
Setting the PATH Environment Variable
Regardless of your operating system, setting the PATH environment variable is crucial. This step allows your system to locate the ChromeDriver executable without specifying its full path every time you run your Selenium scripts. Failure to do this will result in errors when trying to execute your automation code.
The specific steps for setting the PATH variable are Artikeld above for each operating system. Remember to restart your terminal or command prompt after making changes to the PATH for them to take effect. If you encounter issues, double-check the path you’ve entered for any typos.
Troubleshooting ChromeDriver Installation Issues: Download Chromedriver

So, you’ve downloaded ChromeDriver, but it’s not working? Don’t panic! ChromeDriver installation problems are pretty common, usually stemming from version mismatches or path issues. Let’s troubleshoot some of the most frequent headaches. This section provides common errors and their solutions, focusing on practical fixes you can implement.
Common ChromeDriver Errors and Solutions
Troubleshooting ChromeDriver often involves careful examination of error messages and system configurations. The following table summarizes common issues and their resolutions. Remember to always double-check your ChromeDriver version against your Chrome browser version.
| Error Message (or Symptom) | Solution |
|---|---|
| “ChromeDriver was started successfully, but then crashed.” or similar crash messages. | This often points to a compatibility problem. Ensure your ChromeDriver version precisely matches your Chrome browser version. Download the correct ChromeDriver from the official website. Also, check your system’s resources – insufficient RAM or CPU power could lead to crashes. Consider restarting your computer. |
| “The ChromeDriver executable needs to be in PATH.” | This means the system can’t find ChromeDriver. You need to add the directory containing ChromeDriver to your system’s PATH environment variable. The exact steps depend on your operating system (Windows, macOS, Linux). For Windows, you might search “environment variables” in the start menu, and add the ChromeDriver directory to the “Path” variable. For macOS and Linux, you’ll likely need to edit your shell configuration file (e.g., .bashrc, .zshrc). After making changes, restart your terminal or computer. |
| “unknown error: cannot find Chrome binary” | ChromeDriver can’t locate your Chrome installation. Make sure Chrome is installed and that the path to your Chrome executable is correctly specified (if you’re using a custom path). Try using the `–chromedriver-executable` option with your Selenium code to explicitly specify the ChromeDriver path. For example: webdriver.Chrome(executable_path="/path/to/chromedriver"). Replace `/path/to/chromedriver` with the actual path to your ChromeDriver executable. |
| “session not created: This version of ChromeDriver only supports Chrome version X-Y” | This is a version mismatch. Your ChromeDriver version doesn’t support your Chrome browser version. Download the correct ChromeDriver version that matches your Chrome version from the official website. |
| ChromeDriver fails to launch, no error message. | Try running ChromeDriver from the command line directly. This can sometimes reveal hidden errors. Check file permissions to ensure ChromeDriver has the necessary execution rights. Also, consider running your code as administrator (Windows) to see if there are permission-related problems. |
Using ChromeDriver with Selenium
Okay, so you’ve got ChromeDriver downloaded and ready to go. Now, let’s talk about how to actuallyuse* it with Selenium, the popular browser automation framework. Basically, Selenium acts as the bridge between your code and the browser, allowing you to control it programmatically. ChromeDriver is the specific driver that lets Selenium talk to Chrome.Selenium WebDriver provides a platform-independent API to control web browsers.
It uses a driver specific to the browser you want to automate (like ChromeDriver for Chrome, geckodriver for Firefox, etc.). This driver acts as an intermediary, translating your Selenium commands into browser-specific instructions. This setup enables you to write tests or scripts that can interact with web pages in a consistent way, regardless of the underlying browser.
Selenium WebDriver Configuration with ChromeDriver
To get started, you’ll need to have both Selenium and ChromeDriver installed. We’ve covered ChromeDriver installation; for Selenium, you’ll typically use a package manager like pip (for Python). Once installed, the key is making sure Selenium knows where to find your ChromeDriver executable. The simplest way to do this is to place the ChromeDriver executable in your system’s PATH environment variable.
This allows Selenium to automatically locate the driver without needing to specify its full path in your code. Alternatively, you can explicitly provide the path to the ChromeDriver executable when initializing the WebDriver instance in your Selenium code.
Example Code: Basic ChromeDriver Usage with Selenium
Let’s see a simple Python example. This code opens Chrome, navigates to Google’s homepage, and then closes the browser. Remember to replace `”path/to/chromedriver”` with the actual path to your ChromeDriver executable if you haven’t added it to your PATH.“`pythonfrom selenium import webdriver# Replace with the actual path to your chromedriver executable if not in PATHdriver_path = “path/to/chromedriver” driver = webdriver.Chrome(executable_path=driver_path)driver.get(“https://www.google.com”)driver.quit()“`This code first imports the `webdriver` module from the Selenium library.
Then, it creates a `Chrome` instance of the WebDriver, specifying the path to the ChromeDriver executable. The `driver.get()` method navigates to the specified URL, and finally, `driver.quit()` closes the browser and releases resources. This is a bare-bones example, but it demonstrates the fundamental interaction between Selenium and ChromeDriver. More complex scenarios would involve interacting with page elements using Selenium’s methods for finding elements (like `find_element` and `find_elements`) and performing actions like clicking buttons or filling forms.
Automating Chrome Browser Actions
Okay, so you’ve got ChromeDriver all set up and ready to roll. Now for the fun part: actuallyusing* it to automate stuff in Chrome. This is where Selenium really shines, letting you control the browser programmatically. Think of it as giving your code superpowers to interact with websites like a real user.Using Selenium with ChromeDriver allows for incredibly precise control over Chrome.
You can automate almost any action a human user can perform, from navigating to specific URLs to filling out complex forms and interacting with dynamic elements. This opens up a world of possibilities for testing, web scraping, and more.
Opening Web Pages
To open a webpage, you’ll use the `get()` method of the WebDriver object. This method takes a URL as an argument and navigates the browser to that page. For example, the following Python code snippet opens Google’s homepage:“`pythonfrom selenium import webdriverfrom selenium.webdriver.chrome.service import Service as ChromeServicefrom webdriver_manager.chrome import ChromeDriverManagerdriver = webdriver.Chrome(service=ChromeService(ChromeDriverManager().install()))driver.get(“https://www.google.com”)“`This code first initializes the ChromeDriver using `webdriver_manager` to handle driver downloads and updates automatically, then uses the `get()` method to navigate to Google.
After the page loads, you can start interacting with its elements.
Clicking Buttons
Locating and clicking buttons involves finding the button element on the page using its ID, class name, or other attributes, then using the `click()` method. For instance, if a button has an ID of “submit-button,” the following code clicks it:“`pythonbutton = driver.find_element(“id”, “submit-button”)button.click()“`This code snippet first finds the button element using its ID and then uses the `click()` method to simulate a user clicking the button.
Error handling (e.g., checking if the element exists before attempting to click it) is crucial in real-world applications.
Filling Forms
Automating form filling is straightforward using the `send_keys()` method. This method takes text as an argument and sends it to the specified input field. Let’s say you have an input field with the ID “username”:“`pythonusername_field = driver.find_element(“id”, “username”)username_field.send_keys(“your_username”)“`This code finds the username field and enters “your_username” into it. You’d repeat this process for other form fields (passwords, addresses, etc.), ensuring proper element identification.
A List of Automable Actions
Automating browser actions goes far beyond these basic examples. Here’s a glimpse of what’s possible:
The following actions highlight the breadth of automation capabilities available with ChromeDriver and Selenium. Proper error handling and robust element location strategies are vital for reliable automation.
- Navigating to different URLs
- Clicking links and buttons
- Filling out forms (text fields, checkboxes, radio buttons, dropdown menus)
- Selecting items from dropdown menus
- Uploading files
- Handling alerts and pop-ups
- Switching between tabs and windows
- Taking screenshots
- Scrolling the page
- Waiting for elements to load (using explicit waits)
- Executing JavaScript code within the browser
- Interacting with iframes
- Handling cookies
Managing Multiple ChromeDriver Instances
Okay, so you’ve got the hang of using ChromeDriver with Selenium, but what happens when you need to run multiple Chrome browser instances simultaneously? This is more common than you might think – think automated testing across different browsers, or scraping data from multiple sites concurrently. Managing multiple instances effectively requires careful planning and a solid understanding of how ChromeDriver interacts with the operating system.Running multiple ChromeDriver instances presents some unique challenges.
Okay, so you need to download chromedriver, right? That’s a pretty standard step for web automation. If you’re working on something more complex, maybe involving data analysis after scraping, check out this awesome resource on matlab onramp – it might be super helpful. Then, once you’ve got that sorted, remember to put chromedriver in the right directory before running your scripts; otherwise, you’ll get errors.
Primarily, each instance consumes system resources – memory, CPU, and network bandwidth. If you don’t manage these resources carefully, you risk system instability or significantly slowed performance. Another issue is port conflicts. By default, ChromeDriver uses a specific port to communicate with each Chrome instance. If multiple instances attempt to use the same port, conflicts will arise, causing crashes or unpredictable behavior.
ChromeDriver Port Management
Efficiently managing multiple ChromeDriver sessions hinges on controlling the ports each instance uses. Instead of relying on the default port, you can explicitly specify a different port for each ChromeDriver instance when launching it. This requires using the `–port` command-line argument with the ChromeDriver executable. For example, you could start one instance on port 9515 and another on port 9516.
Your Selenium code would then need to be adjusted to connect to the correct port for each instance. This prevents port collisions and allows for parallel execution. A simple Python example illustrating this could involve iterating through a list of desired ports and launching a ChromeDriver instance for each. Error handling would be crucial to gracefully manage any port allocation failures.
Resource Management Strategies
To prevent resource exhaustion, it’s important to monitor and control the resources consumed by each ChromeDriver instance. Tools like Task Manager (Windows) or Activity Monitor (macOS) can help monitor CPU and memory usage. If resource consumption becomes excessive, you might need to implement strategies to limit the number of concurrent instances or optimize your Selenium scripts for efficiency.
For example, ensure that you’re properly closing browser windows and ChromeDriver instances when they are no longer needed to prevent resource leaks. Consider using techniques like pooling to reuse ChromeDriver instances rather than creating new ones for each task, thereby reducing the overall resource footprint.
Handling Multiple Sessions Efficiently
A well-structured approach to managing multiple ChromeDriver sessions often involves a combination of techniques. Firstly, you need a clear system for assigning unique ports to each instance. Secondly, your Selenium code should be designed to manage each instance independently. This might involve using separate WebDriver objects for each session, ensuring each has its own dedicated port and handles its own browser interactions.
Finally, implement robust error handling to gracefully manage exceptions and prevent cascading failures. Consider using a process manager or scheduler to oversee the launching, monitoring, and termination of ChromeDriver instances, enhancing control and stability. This allows for a more robust and reliable system for running multiple browser automation tasks simultaneously.
ChromeDriver and Headless Browsing
Headless browsing, the ability to run a browser without a graphical user interface (GUI), is a powerful feature often used for automated testing and web scraping. It allows you to interact with web pages programmatically without the overhead of a visible browser window, significantly speeding up processes and reducing resource consumption. This section will explore how to leverage ChromeDriver’s capabilities for headless execution, highlighting its advantages and disadvantages.
Using ChromeDriver in headless mode essentially means instructing Chrome to run without displaying a visual browser window. This is achieved through command-line arguments passed to the ChromeDriver executable. The benefits are substantial, particularly in scenarios requiring numerous automated tasks or server-side operations where a visual interface is unnecessary.
Headless Chrome Execution with ChromeDriver
To run Chrome in headless mode, you need to specify the `–headless` flag when initializing your ChromeDriver instance. This tells Chrome to operate without a visible window. Here’s how you’d do it using Python and the Selenium library:
from selenium import webdriver
from selenium.webdriver.chrome.options import Options

# Set up Chrome options
chrome_options = Options()
chrome_options.add_argument("--headless=new") # Use --headless=new for Chrome 114+

# Initialize ChromeDriver with headless options
driver = webdriver.Chrome(options=chrome_options)

# Navigate to a webpage
driver.get("https://www.example.com")

# Perform actions (e.g., get page title)
page_title = driver.title
print(f"Page title: page_title")

# Close the browser
driver.quit()
Benefits of Headless Browsing
Headless browsing offers several key advantages:
The primary benefit is speed. Because there’s no GUI to render, headless Chrome executes much faster, especially when performing repetitive tasks. This is crucial for large-scale automation projects where time is a critical factor. Furthermore, headless execution reduces resource consumption, making it ideal for server environments with limited resources or cloud-based automation. Finally, it enhances the reliability of automated tests by eliminating the variability introduced by a user’s interaction with the GUI.
Drawbacks of Headless Browsing
While headless browsing offers numerous advantages, there are also some drawbacks to consider:
One limitation is the inability to visually inspect the rendered webpage during execution. Debugging can become more challenging since you lack the visual feedback provided by a traditional browser window. Additionally, some JavaScript-heavy websites might not render correctly in headless mode, leading to unexpected behavior in your automation scripts. Finally, certain browser features relying on the GUI, like extensions or browser-specific dialogues, may not function as expected in a headless environment.
Security Best Practices with ChromeDriver
Using ChromeDriver to automate Chrome actions offers significant advantages, but it also introduces potential security risks if not handled carefully. Ignoring these risks can expose your system to vulnerabilities, leading to data breaches or malicious code execution. This section Artikels crucial security best practices to ensure safe and responsible ChromeDriver usage.ChromeDriver, like any automation tool, can be exploited by malicious actors.
The risks range from unauthorized access to your system to the execution of harmful scripts. Understanding these risks and implementing appropriate mitigation strategies is crucial for maintaining a secure environment.
Potential Security Risks and Vulnerabilities
Several vulnerabilities can arise from improper ChromeDriver usage. These include the injection of malicious code through manipulated input, unauthorized access to sensitive data within the automated browser session, and the potential for privilege escalation if the ChromeDriver process is compromised. Furthermore, outdated ChromeDriver versions are particularly vulnerable to known exploits, highlighting the importance of keeping it updated. A compromised ChromeDriver instance can be used to perform actions on behalf of the user, including accessing personal information or modifying system settings.
Recommendations to Mitigate Security Risks, Download chromedriver
Effective mitigation requires a multi-layered approach. This includes regularly updating ChromeDriver to the latest version, which often includes security patches addressing known vulnerabilities. Using a dedicated, isolated user account for running ChromeDriver minimizes the impact of a potential compromise, preventing access to sensitive files or system-level operations.
Additionally, careful input sanitization is crucial. Never directly use user-provided input without thoroughly validating and escaping it to prevent Cross-Site Scripting (XSS) attacks. This involves removing or encoding potentially harmful characters before passing them to the ChromeDriver. For example, a simple script might take user input and use it to navigate to a URL; without sanitization, a malicious user could inject JavaScript code into the URL, causing it to execute on the target system.
Running ChromeDriver in a Sandbox Environment
Running ChromeDriver within a virtual machine (VM) or container offers an additional layer of security. If the ChromeDriver process is compromised, the damage is contained within the isolated environment, protecting the host system. This provides a significant security benefit, especially when working with sensitive data or when dealing with untrusted code. The VM or container can be easily discarded and replaced if compromised.
Regular Security Audits and Vulnerability Scanning
Regular security audits and vulnerability scans should be part of any responsible automation workflow involving ChromeDriver. These help identify potential weaknesses in your implementation and configuration, allowing you to address them proactively. This proactive approach helps maintain a secure environment and minimizes the risk of exploitation.
Principle of Least Privilege
Granting ChromeDriver only the necessary permissions is paramount. Avoid running it with administrator or root privileges unless absolutely necessary. This minimizes the potential damage if the process is compromised. The principle of least privilege significantly reduces the attack surface, limiting the potential impact of a successful attack.
Concluding Remarks

So, there you have it – a complete guide to conquering ChromeDriver! From the initial download to advanced techniques like headless browsing, you’re now equipped to seamlessly integrate ChromeDriver into your projects. Remember to always prioritize downloading from official sources to ensure security and compatibility. Happy automating!
FAQ
What happens if I download the wrong ChromeDriver version?
You’ll likely encounter errors when trying to automate Chrome. Make sure the ChromeDriver version matches your Chrome browser version.
Can I use ChromeDriver with other browsers besides Chrome?
Nope, ChromeDriver is specifically designed for Chrome. You’ll need different drivers (like geckodriver for Firefox) for other browsers.
Where can I find more advanced Selenium tutorials?
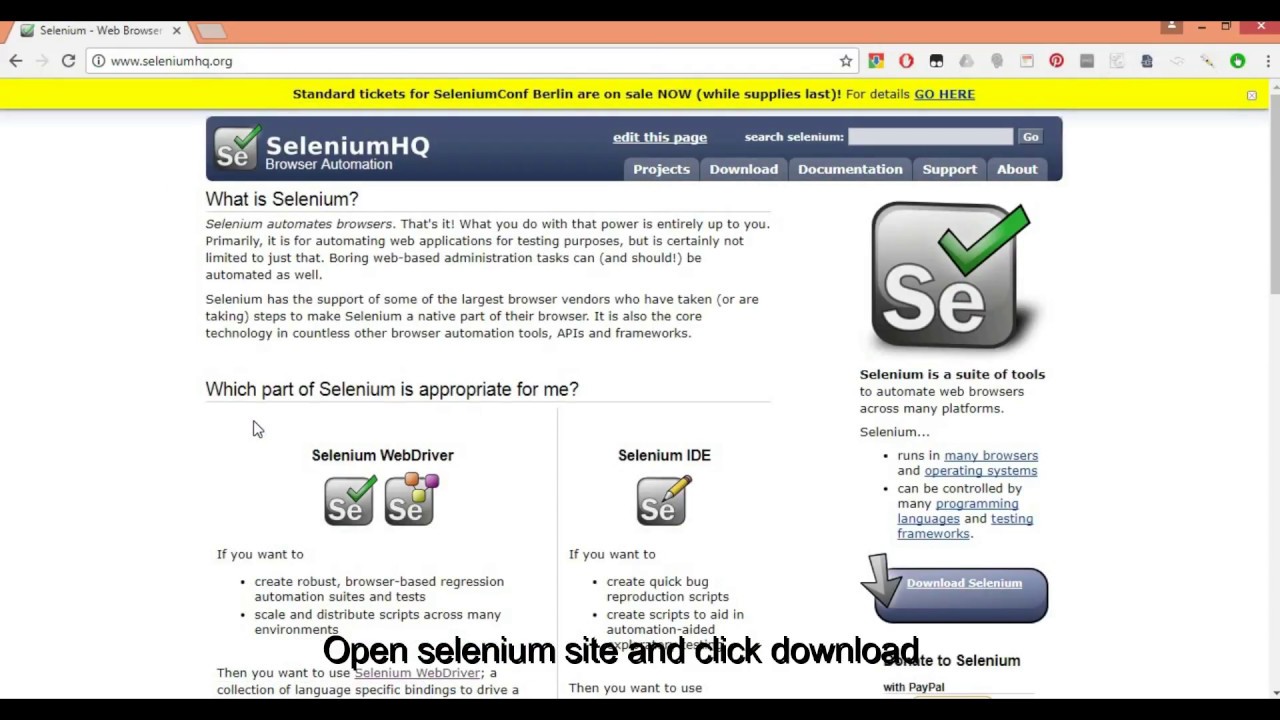
Check out websites like SeleniumHQ.org and look for tutorials on specific automation tasks. YouTube is also a great resource!
Is it safe to download ChromeDriver from unofficial sources?
Generally, no. Unofficial sources could contain malware or modified drivers. Stick to the official Chromium project website for safe downloads.
What if my ChromeDriver isn’t working after installation?
Double-check your environment variables to ensure ChromeDriver is in your PATH. Also, make sure your Selenium code correctly specifies the ChromeDriver path.