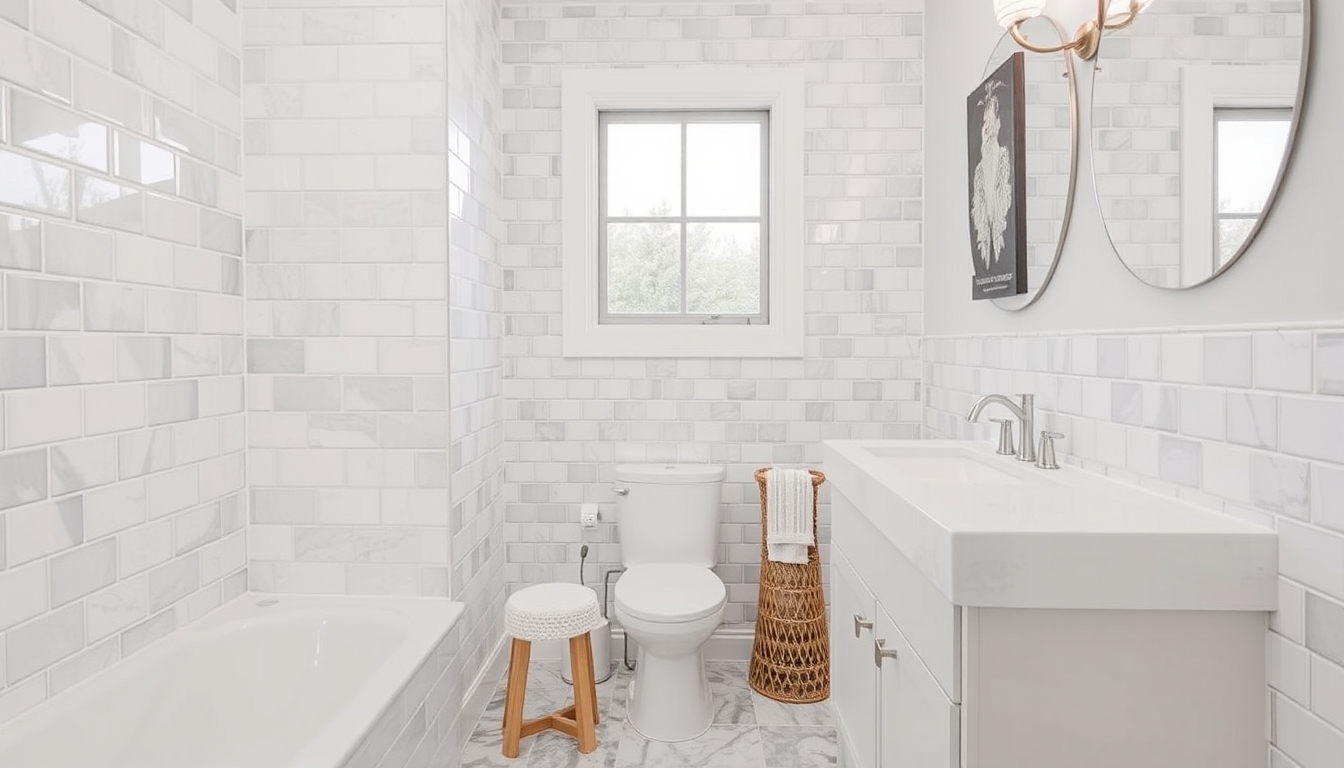
Are you tired of your dull and outdated bathroom? Do you dream of a beautiful, stylish space that reflects your personal taste? Look no further! With our comprehensive guide on DIY bathroom tile installation, you can easily revamp your bathroom without breaking the bank. Whether you’re a seasoned DIY enthusiast or a beginner, this step-by-step tutorial will walk you through the entire process, helping you achieve professional-looking results. Say goodbye to expensive contractors and hello to a stunning bathroom transformation – all with your own two hands!
Choosing the Right Tiles for Your Bathroom
When it comes to selecting tiles for your bathroom, the options can be overwhelming. But fear not, we’re here to guide you through the process. Consider the following factors to ensure you choose the perfect tiles for your DIY project:
1. Material
The material of the tiles plays a crucial role in both the aesthetics and durability of your bathroom. Popular options include ceramic, porcelain, natural stone, and glass. Ceramic tiles are affordable and come in various designs, making them a versatile choice. Porcelain tiles are highly durable and water-resistant, making them ideal for moisture-prone areas like bathrooms. Natural stone tiles, such as marble or granite, add a touch of luxury but may require more maintenance. Glass tiles offer a sleek and modern look, perfect for creating an accent or feature wall.
2. Size and Shape
The size and shape of the tiles can greatly impact the overall look of your bathroom. Larger tiles create an illusion of a more spacious area, while smaller tiles can add intricate details and patterns. Consider the size of your bathroom and the desired effect you want to achieve. Rectangular tiles can create a sense of height, while square tiles offer a classic look. Additionally, mosaic tiles can add a unique and artistic touch.
3. Color and Finish
Your choice of color and finish can set the tone for your bathroom. Light-colored tiles can make a small bathroom appear larger and brighter, while darker shades can add depth and sophistication. Consider the overall color scheme and style of your bathroom when selecting tiles. Additionally, the finish of the tiles can range from matte to glossy. Matte tiles offer a more subtle and natural look, while glossy tiles can reflect light and create a polished appearance.
By carefully considering the material, size and shape, as well as the color and finish of the tiles, you can ensure a harmonious and visually pleasing bathroom design. Now that you have chosen your tiles, let’s move on to the next step in your DIY tile installation journey.
Preparing Your Bathroom for Tile Installation
Before you dive into the exciting process of installing your bathroom tiles, it’s essential to prepare the area properly. Here are the steps to follow:
1. Clear the Space
Start by removing all items from your bathroom, including toiletries, rugs, and any furniture or fixtures that may obstruct your work area. Clearing the space will not only make it easier for you to work but also protect your belongings from potential damage.
2. Remove Old Tiles (If Necessary)
If you’re replacing old tiles, you’ll need to remove them first. Use a hammer and chisel to carefully break the tiles, starting from the edges. Be cautious not to damage the underlying surface. Once the tiles are removed, clean the area thoroughly and ensure it’s free from any debris or adhesive residue.
3. Repair and Level the Subfloor
Inspect the subfloor for any signs of damage, such as cracks or unevenness. Repair any issues and ensure the subfloor is sturdy and level. A smooth and even surface is crucial for a successful tile installation.
4. Measure and Plan
Measure your bathroom accurately to determine the amount of tiles you’ll need. Consider any cuts or angles that may be required, and plan the layout accordingly. This step will help you avoid any surprises or last-minute adjustments during the installation process.
5. Gather the Necessary Tools and Materials
Make sure you have all the tools and materials you’ll need for the tile installation. This may include a tile cutter, trowel, grout float, spacers, adhesive, grout, and a sponge for cleaning. Having everything ready before you start will save you time and ensure a smoother workflow.
By properly preparing your bathroom, you’ll create a solid foundation for your tile installation project. Now that you’re ready to begin, let’s move on to the next section where we’ll guide you through the actual installation process.
Installing Your Bathroom Tiles
Now comes the exciting part – installing your bathroom tiles! Follow these step-by-step instructions to ensure a successful installation:
1. Prepare the Adhesive
Follow the manufacturer’s instructions to prepare the tile adhesive. Use a trowel to spread a thin and even layer of adhesive onto the subfloor, working in small sections at a time. Be mindful of the recommended drying time for the adhesive.
2. Lay the Tiles
Start laying the tiles onto the adhesive, following your planned layout. Press each tile firmly into place and use tile spacers to ensure even spacing between tiles. Check periodically with a level to ensure they’re level and aligned correctly.
3. Make Necessary Cuts
As you reach edges or areas that require smaller or custom-sized tiles, use a tile cutter to make the necessary cuts. Take your time and measure accurately to achieve precise results. Safety goggles and gloves are recommended when cutting tiles.
4. Allow the Tiles to Set
After you’ve installed all the tiles, allow them to set and adhere to the adhesive according to the manufacturer’s instructions. This may take a day or two, so be patient and avoid walking on the tiles during this time.
5. Apply Grout
Once the tiles have set, it’s time to apply the grout. Mix the grout according to the instructions and use a grout float to spread it over the tiles, ensuring all the gaps are filled. Wipe away any excess grout with a damp sponge, being careful not to remove too much from the gaps.
6. Clean and Seal
After the grout has dried, clean the tiles with a damp sponge to remove any grout haze. Once the tiles are dry, consider applying a sealant to protect them from moisture and stains. Follow the manufacturer’s instructions for the sealant application.
With these steps, your bathroom tiles are now installed and ready to impress! Take a moment to admire your hard work and enjoy the transformed space. In the next section, we’ll provide some tips and tricks for maintaining and caring for your newly tiled bathroom.
Maintaining and Caring for Your Bathroom Tiles
Now that your bathroom tiles are beautifully installed, it’s important to maintain them to ensure their longevity and keep them looking pristine. Follow these tips to care for your bathroom tiles:
1. Regular Cleaning
Regularly clean your tiles using a mild, non-abrasive cleaner and a soft cloth or sponge. Avoid using harsh chemicals or abrasive cleaners that can damage the tiles. Wipe away any spills or stains promptly to prevent them from seeping into the grout.
2. Grout Maintenance
Keep your grout clean by periodically scrubbing it with a soft brush and a mild grout cleaner. Avoid using abrasive tools or harsh chemicals that can erode the grout. If you notice any cracks or damage to the grout, repair it promptly to prevent moisture from seeping underneath the tiles.
3. Preventive Measures
Prevent damage to your tiles by using protective mats or rugs in high traffic areas, such as in front of the sink or shower. This will help reduce wear and tear on the tiles. Additionally, avoid using heavy or sharp objects that can potentially chip or scratch the tiles.
4. Regular Inspections
Periodically inspect your tiles and grout for any signs of damage, such as cracks, loose tiles, or mold growth. Address any issues promptly to prevent further damage and ensure the longevity of your tiles.
5. Professional Maintenance
If you encounter significant issues or damage that you’re unable to fix on your own, it’s recommended to seek professional help. Professional tile cleaners and repairers have the expertise and tools to handle more complex problems and restore your tiles to their original condition.
By following these maintenance tips, you can keep your bathroom tiles looking fresh and beautiful for years to come. Congratulations on completing your DIY bathroom tile installation! Your hard work and attention to detail have truly paid off. Enjoy your newly transformed bathroom and the satisfaction of a job well done.
Conclusion: A Stunning Bathroom Transformation
Congratulations on successfully completing your DIY bathroom tile installation! By following our comprehensive guide, you have transformed your bathroom into a beautiful and stylish space that reflects your personal taste. Not only have you saved money by doing it yourself, but you have also gained the satisfaction of a job well done.
Remember, choosing the right tiles, preparing the area properly, and following the correct installation techniques are key to achieving professional-looking results. With proper maintenance and care, your bathroom tiles will continue to dazzle for years to come.
We hope this guide has provided you with the knowledge and confidence to take on your next DIY project. Be sure to explore our website for more helpful tips and inspiration for your home improvement endeavors.
Thank you for joining us on this journey of creating a stunning bathroom transformation. Enjoy your new space and the endless possibilities it brings!
FAQs About DIY Bathroom Tile Installation
As you embark on your DIY bathroom tile installation journey, you may have some questions in mind. Here are answers to some commonly asked questions:
1. How long does it take to complete a bathroom tile installation?
The time it takes to complete a bathroom tile installation can vary depending on the size of the bathroom, the complexity of the design, and your level of experience. On average, it can take a few days to a week to complete the installation, including preparation, tile laying, grouting, and drying time.
2. Can I install tiles over existing tiles?
Yes, it is possible to install tiles over existing tiles. However, it’s essential to ensure that the existing tiles are firmly adhered to the surface and in good condition. The surface should be thoroughly cleaned and any loose or damaged tiles should be removed or repaired before proceeding with the installation.
3. Do I need to seal the tiles?
Sealing the tiles is not always necessary, as it depends on the type of tiles you’ve chosen. Porcelain and natural stone tiles are often recommended to be sealed to protect them from stains and moisture penetration. However, ceramic tiles generally do not require sealing. Refer to the manufacturer’s guidelines for specific recommendations regarding your chosen tiles.
4. Can I install tiles on a sloped or uneven floor?
It is not recommended to install tiles on a sloped or uneven floor, as it can lead to issues with stability and potential tile cracking. It’s important to ensure that the subfloor is level and in good condition before proceeding with the installation. If you have a sloped floor, it may be necessary to consult a professional for proper leveling or consider alternative flooring options.
5. What tools do I need for a bathroom tile installation?
Some essential tools for a bathroom tile installation include a trowel, tile cutter, grout float, sponge, level, and tile spacers. Depending on the complexity of your project, you may also need additional tools such as a notched trowel, tile nippers, or a wet saw. It’s important to have the necessary tools ready before starting the installation to ensure a smooth workflow.
These are just a few common questions that may arise during a DIY bathroom tile installation. If you have any specific concerns or uncertainties, it’s always best to consult with professionals or seek guidance from reputable sources. Enjoy your tile installation journey and may your bathroom be a haven of style and comfort!
Tips for a Successful DIY Bathroom Tile Installation
As you begin your DIY bathroom tile installation, it’s helpful to keep these tips in mind to ensure a successful outcome:
1. Plan and Measure Carefully
Take the time to plan your tile layout and measure accurately. This will help you avoid running out of tiles or ending up with awkward cuts. Consider the placement of fixtures and outlets, and plan your cuts accordingly.
2. Use High-Quality Materials
Invest in high-quality tiles, adhesive, and grout. While these may cost a bit more upfront, they will provide better durability and longevity. Quality materials will also contribute to a more professional-looking result.
3. Start Small and Gain Confidence
If you’re new to tile installation, start with a smaller area, such as a backsplash or a powder room. This will allow you to practice your skills and gain confidence before taking on larger projects like a full bathroom floor.
4. Follow Proper Safety Measures
Tile installation involves working with tools and materials that can be hazardous. Wear appropriate safety gear, such as goggles and gloves, when cutting tiles or handling adhesives. Take precautions to ensure your safety throughout the process.
5. Take Your Time with Tile Placement
When laying the tiles, take your time to ensure they are properly aligned and level. Adjust as necessary before the adhesive dries. Pay attention to spacing and use tile spacers to maintain consistent gaps between tiles.
6. Keep Grout Lines Clean
As you work, periodically clean excess adhesive or grout from the tile surfaces and grout lines. This will make the cleaning process easier and result in a neater finish. Use a damp sponge or cloth to wipe away any residue.
7. Allow Ample Drying Time
Be patient and allow sufficient drying time for both the adhesive and grout. Rushing this step can compromise the integrity of the installation. Follow the manufacturer’s recommendations for drying times and avoid putting stress on the tiles until they are fully set.
By following these tips, you’ll be well on your way to a successful DIY bathroom tile installation. Trust your abilities, take your time, and enjoy the process. With careful planning and attention to detail, you’ll achieve a stunning bathroom transformation that you can be proud of!
Considerations for Hiring a Professional for Bathroom Tile Installation
While a DIY bathroom tile installation can be a rewarding and cost-effective project, there are instances where hiring a professional may be the better option. Here are some considerations to keep in mind:
1. Complexity of the Project
If your bathroom tile installation involves intricate designs, intricate cuts, or specialized materials, it may be best to hire a professional. They have the expertise and tools to handle complex projects and ensure precise results.
2. Time Constraints
Consider your timeline for the project. If you’re working on a tight schedule or don’t have the flexibility to dedicate several days or weeks to the installation, hiring a professional can expedite the process and ensure timely completion.
3. Lack of Experience and Skill
If you have limited experience with tile installation or lack the necessary skills, it’s wise to hire a professional. They have the knowledge and expertise to handle any challenges that may arise during the installation process.
4. Structural Issues or Repairs
If your bathroom has underlying structural issues or requires repairs before installing tiles, it’s advisable to consult a professional. They can assess the situation, address any problems, and ensure a solid foundation for the tile installation.
5. Warranty and Guarantees
Professional tile installers often provide warranties or guarantees for their work. This can give you peace of mind knowing that any potential issues or defects will be addressed and resolved by the professionals.
6. Cost Considerations
While DIY tile installation can save money on labor costs, it’s essential to weigh the overall expenses. Evaluate the cost of materials, tools, and your own time against the price of hiring a professional. Sometimes, the cost difference may not be significant, especially when considering the quality and longevity of a professional installation.
When deciding whether to hire a professional for your bathroom tile installation, carefully assess your own abilities, project requirements, and budget. Ultimately, the choice should be based on what will result in the best outcome for your specific circumstances. Whether you choose to tackle the project yourself or hire a professional, the goal is to create a beautiful and functional bathroom space that you can enjoy for years to come.
In conclusion, a DIY bathroom tile installation can be a rewarding and cost-effective way to transform your bathroom into a stunning space that reflects your personal style. With careful planning, proper preparation, and attention to detail, you can achieve professional-looking results. However, it’s important to consider the complexity of the project, your own skill level, and the time constraints you have before deciding whether to tackle the installation yourself or hire a professional.
By choosing the right tiles, preparing the area properly, and following the correct installation techniques, you can create a beautiful and durable tiled bathroom that enhances the overall aesthetics of your home. Remember to maintain and care for your tiles regularly to ensure their longevity and keep them looking their best.
We hope this comprehensive guide has provided you with valuable insights and tips for your DIY bathroom tile installation. Whether you choose to embark on the project yourself or enlist the help of a professional, the end result will be a stunning bathroom that adds both functionality and style to your home. Good luck, and may your bathroom transformation be a success!